ERM: Editing Indexes and Databases Subject Drop-down Menu
Purpose: To record the steps to edit the HTML code that drives the subject drop-down menu on the Indexes & Databases webpage.
Overview: Between 2016-2017, Fogler Library migrated its website from being authored as HTML in Expression Web 4.0 software, to the WordPress WYSIWYG platform provided by the UMaine Division of Marketing and Communications. The reason for this switch was two fold: first, the distributed work model within the library began to falter as fewer staff had experience in HTML editing; and second, to more closely align the library website with University branding.
Once the migration was underway, it was discovered that the annual subscription fee to support .asp files in WordPress was prohibitive for the library to assume. As a result, Technical Services staff was ordered to re-create the WordPress template in HTML for both Indexes and Databases and eJournals.
As of the date of this writing, the indexesdb web share and ejournals web share continue to reside on the Library18 server. Editing these webpages requires the use of an HTML editor such as Dreamweaver, available from Adobe.1
Editing the Subject Drop-down Menu
Open your HTML editing software and map to Library18. (Dreamweaver is used in this example.) Technical support for this step may be found on the Adobe Dreamweaver User Guide.
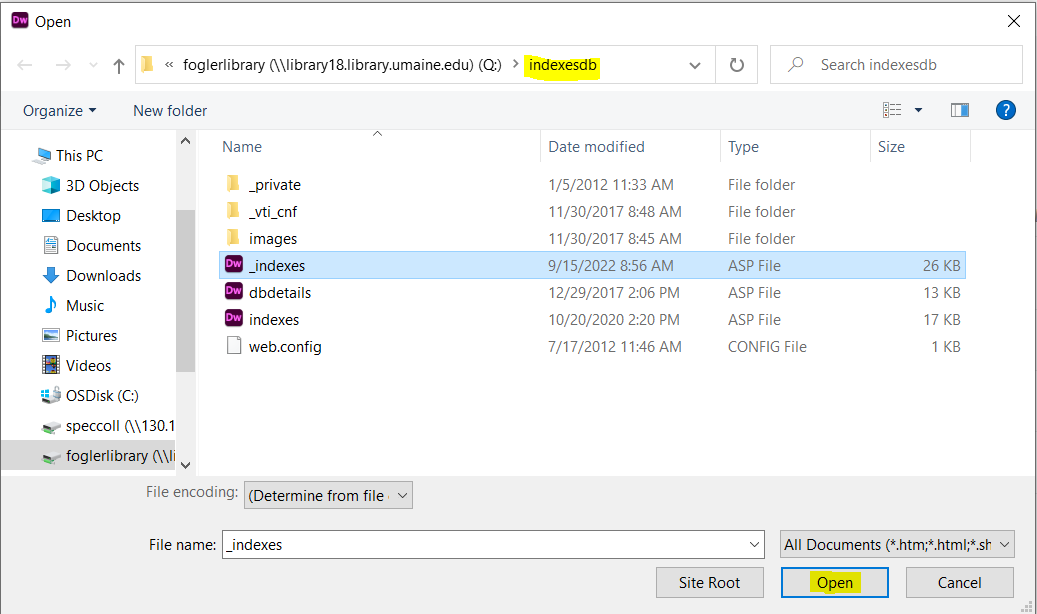
- Click the “Open” button in the left hand menu.
- Navigate to the indexesdb webshare.
- Select the file _indexes.asp
- Click the “Open” button.
- Before doing any editing, go to File > Save As and create a backup file entitled “_indexes-bkup-[date].” This will allow you to recover the resource should something go very, very badly.
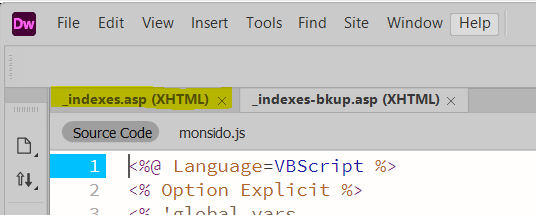
Review the open pages in your HTML editor and close the new backup page and confirm you are working in the live _indexes.asp (XHTML) page.
Editing Introductory Text on IDB Page
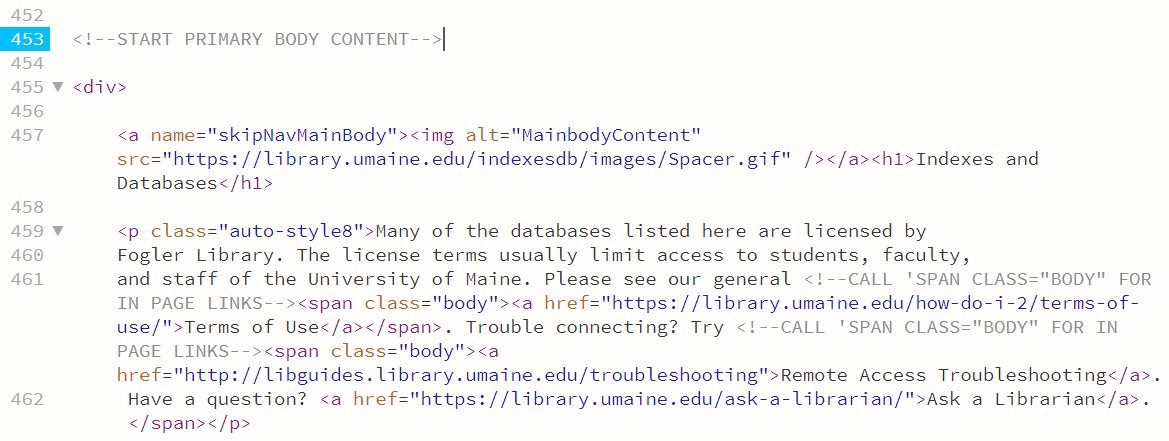
Working in the Code or Split view, scroll down the code until you reach line 453, <!–START PRIMARY BODY CONTENT–>. The text display in this section of the webpage is p class=”auto-style8.” Confirm you are using this paragraph class attribute. (NOTE: all attributes are self-contained on the page.)
Editing of the text can take place in either the code view or layout view.
Editing Option Values
- Scroll down to line 481, <!– Begin Libguide based topic pulldown –>
- DO NOT DELETE the line “ ” as this is required for appropriate formatting in the live webpage.
- DO NOT ALTER the “select” code.
The subject guide drop-down menu permits students who need help finding electronic resources to navigate directly to an existing subject LibGuide for information about indexes and databases related to their area of study.
NOTE: Whenever a subject specialist changes the URL of a LibGuide or creates a new LibGuide, the URL information must be updated here to avoid broken links and patron frustration.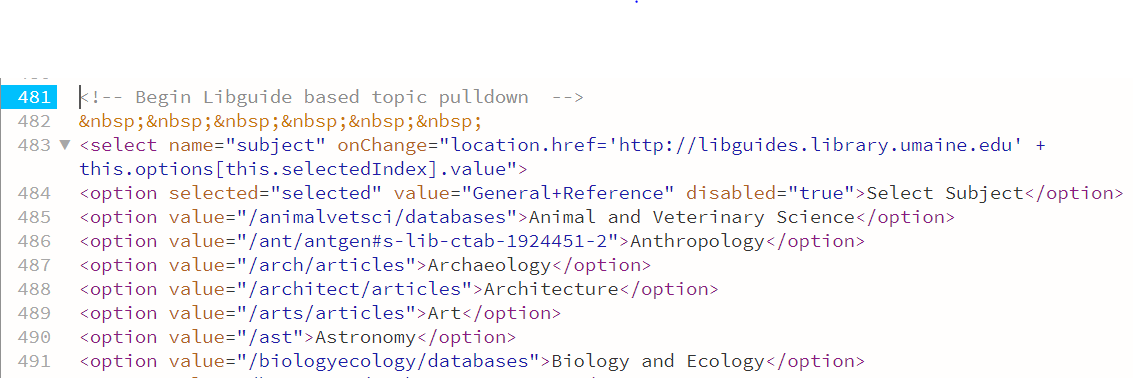
All LibGuide URLs are comprised of two parts. Each URL begins with “https://libguides.library.umaine.edu…” and ends with the name or URL defined by the subject librarian when creating the designated LibGuide.
Examples (links are not live):
https://libguides.library.umaine.edu/umaine-dance
https://libguides.library.umaine.edu/humandevelopmentguide/childdevelopment
https://libguides.library.umaine.edu/forestresources
What is opened must be closed
To edit the values of the LibGuide subject drop-down, you will modify existing or add new option values.
- Each option value requires being wrapped in the <option value=””> </option>tag.
- All HTML, tags must be opened and closed. In this case, you open the option value tag with <option value=””> and close it with </option>.
If you are not comfortable working in the live page code, you may opt to edit or create new option values in Notepad, then copy and paste the lines into the page code.
- Start by typing or copy and pasting this option value tag: <option value=””>
- Between two straight quote marks (do not use curly quotes) type a slash (/) followed by the name or URL provided to you by the subject librarian. For instance: /umaine-dance or /standards
- Outside of the right-pointing chevron (aka carrot), type the subject of the resource guide provided by the subject specialist. Subjects should be consistent with subjects included in the subject portal and subject guides to avoid patron confusion.
- Close the option value tag by typing or copying and pasting: </option>.
- Save the page.
- Go to the Indexes & Databases webpage and test the link you created in the drop-down menu.
Examples:
<option value=”/animalvetsci/databases”>Animal and Veterinary Science</option>
<option value=”/politicalscience”>Political Science</option>
<option value=”/hist/general”>History</option>
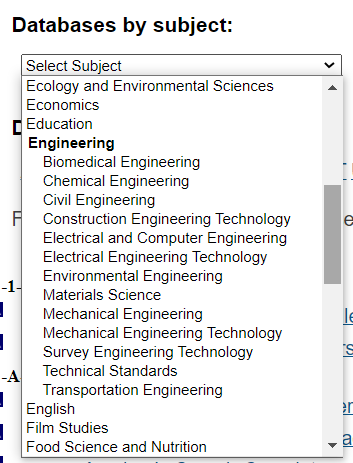
Option Grouping
As of 2022, Engineering is the only subject area with an option group. In the drop-down menu this appears as an inset list with a bold heading (see image below).
- Create a new option group by typing or copying and pasting the following optgroup tag: <optgroup label=””>
- Enter the primary topic between the straight quotes, for example “Engineering.”
- Starting on the next line, add the appropriate option values, as described above.
- Close the optgroup tag by typing or copying and pasting: </optgroup> below the final value option in your group. [This approach formats the code neatly, making it easier for others to edit the page in the future.]
- Save the page and test the view on the live webpage.
Test for Functionality
After you’ve completed your editing and saved changes to the subject drop-down menu, navigate to the Indexes and Databases page in the Fogler Library website and test the link you created in the menu.
Troubleshooting
- No access to the web server? Contact Library Technologies and Innovation.
- Did you edit the live webpage or the backup you created in Step 1?
- Double-check for typos in the HTML code you created.
- Double-check the LibGuide URL provided to you.
- Confirm that your line of code includes both an opening and closing option tag.
Return to Technical Services Table of Contents.
Contact: um.library.technical.services@maine.edu | Created: 09-26-2022 kjs
1Note that in the years following the launch of these pages changes were made to menu options on the Fogler WordPress website that were not communicated to Technical Services staff, therefore the links in the html templates no longer match the full website.